|
Winter is upon us and instead of hibernating, take advantage of the official Night Photography season!
I find winter night shoots to be more productive than the summer as I can shoot earlier and longer. There definitely can be challenges to photographing in the winter, especially in those colder locations in the world. But when it snows there is magic to be made! So bundle up accordingly and I’m going to give you some tips on how to capture those snowglobe winter wonderlands.
Typically, when we photograph at night, we have our camera, tripod, and cable release all good to go. We open the shutter, possibly light paint, and then close the shutter after the extended exposure.
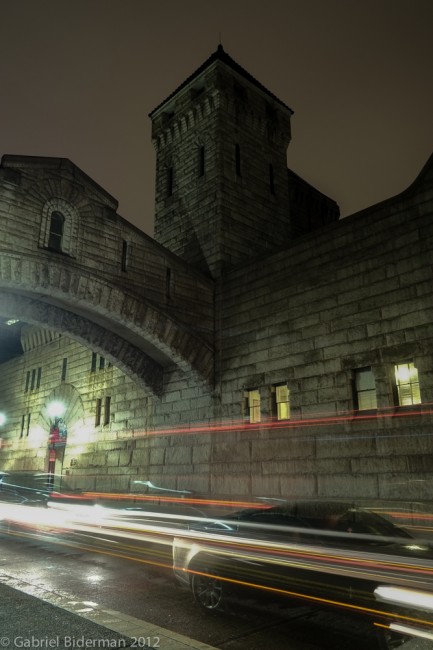
This first shot of Pittsburgh’s Allegheny County Courthouse and Jail, (1888), demonstrates a typical 12 second exposure. But the image isn’t showing the snow that is falling on the scene. That is because the snow is never in the same part of the sky for more than a second.
Look closely – you can see through the car, as it was only there for half of the time. Once it drove out of the scene the camera kept exposing and revealed what was behind it – the yellow double line, the bricks from the building, etc. Direct light is the only thing that can pass through a picture and be forever etched into the image.
Note all the streaks of light – these are the head and rear lights of the cars driving by. The tallest red lights were from a truck, I always like getting different levels of lights from all the types of vehicles that pass by. Snow, unlike rain, is white and reflective. So by using a flash, not a flashlight, we can freeze snow forever in the photograph.
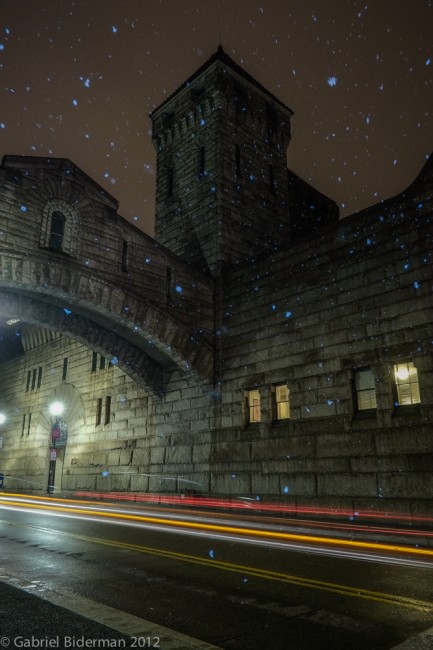
In the second image, I used a Nikon SB910 at 1/8 power off camera. I stood at a 90 degree angle to the right of the camera and manually popped the flash to shoot across the scene. This was important because I didn’t want any extraneous light from the flash to be lighting up the building and background.
I fired the flash 3 times so it could “light up” more snow. My only issue with this image is that the snow is blue. I had set my white balance in camera to 3200 kelvin to cool down the orange light coming from the sodium vapor street lamps. But a flash’s color temperature is set to daylight or 5500 kelvin, which when mixed with the cooler white balance of the camera creates blue snow. I could set my in camera WB to 5500 to match the flash but that would be a 2000+ kelvin change in how I wanted the scene to look. The snow would be white but the rest of the image would be under an ugly orange cast. Even if I cooled it down post, the snow would have changed to blue again because we are globally turning the whole scene cooler.
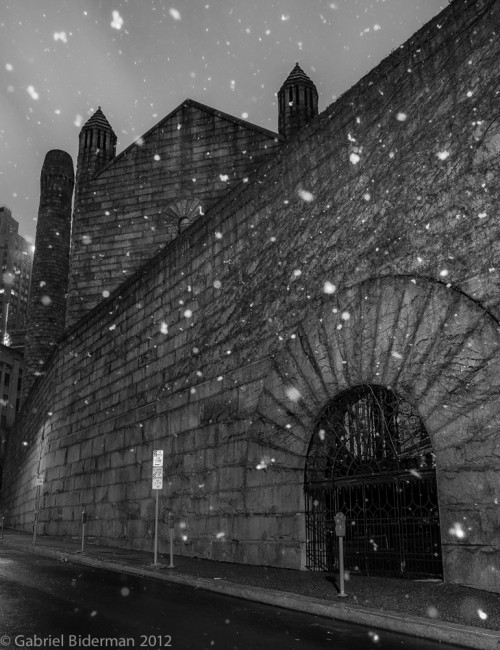
An easy fix is to convert the image to Black and White like I did in the third photograph. This scene actually looks better stripped of color. The formidable fort of a jail appears even more ominous and the snow is of course white. However black and white isn’t the solution for all photographs. The best way to capture white snow with the cooler night color temperatures is to use a CTO, Color Temperature Orange, filter over your flash.
The CTO filter can convert the 5500K of the flash to match the cooler white balance that you have chosen in camera. CTO gels come in a variety of “cuts” – here is a breakdown of the different gels and what they convert to: Full CTO converts 5500K – 2900K 3/4 CTO converts 5500K – 3200K 1/2 CTO converts 5500K – 3800K 1/4 CTO converts 5500K – 4500K 1/8 CTO converts 5500K – 4900K You can purchase a sheet of these gels inexpensively and use them over a variety of flashlights or flashes They are also available in convenient kits by Honl, Rogue, and Rosco. The first step in figuring out what gel to “match” the scene is to take a test shot to figure out your ambient light and what in-camera WB setting will look best. I typically shoot somewhere between 3800k-2900k depending up on the light source in the night scene. Knowing that, I always bring these three CTO gels – 1/2, 3/4, and full cut.
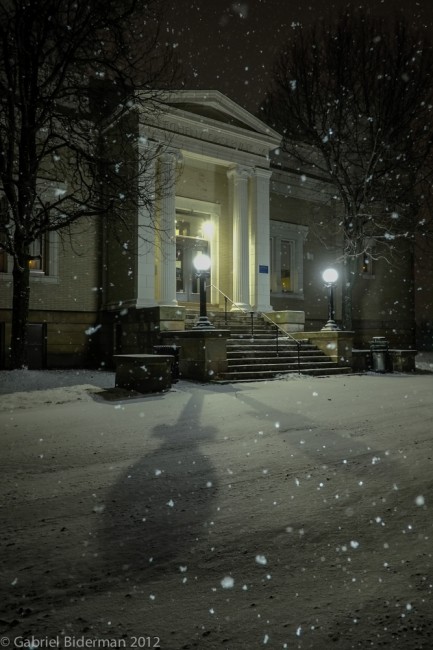
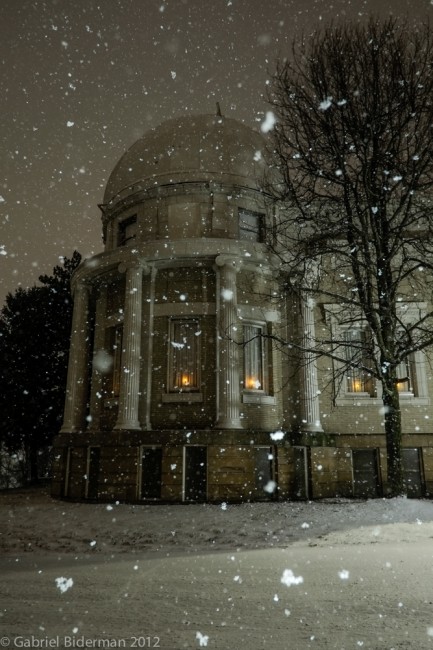
In last two shots of the Allegheny Observatory my camera’s WB was set to 2900 and I used a full CTO gel over the flash.
This time I angled the flash under but about a foot in front of the flash and fired up. That angle was lighting up the snow better and the closer snow made it look bigger. You have to make sure you are not firing into the lens, having a shade not only helps prevent flare but also restricts the amount of snow from landing directly on the lens.
I used 1/8 power and fired 3 times – freezing the snow falling directly in front of the lens. Be conscientious of how many times you pop the flash. Three times seemed to be the perfect amount for how the snow was falling this night.
The last shot shows when I fired the flash 5 times and lit up too much snow and I feel it takes away from the rest of the picture. The snow was also a cold dry snow that wasn’t getting my camera that wet. Typically I would bring an Kata Elements cover to protect the camera from getting wet. So when the weather outside seems frightful, forget that fire so delightful, grab your flash and CTO gels and Let it Snow, Let it Snow, Let it Snow!
