How to successfully shoot snow

Posted on


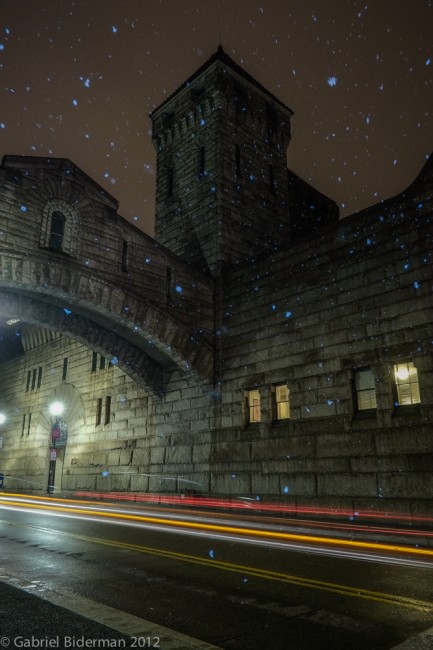
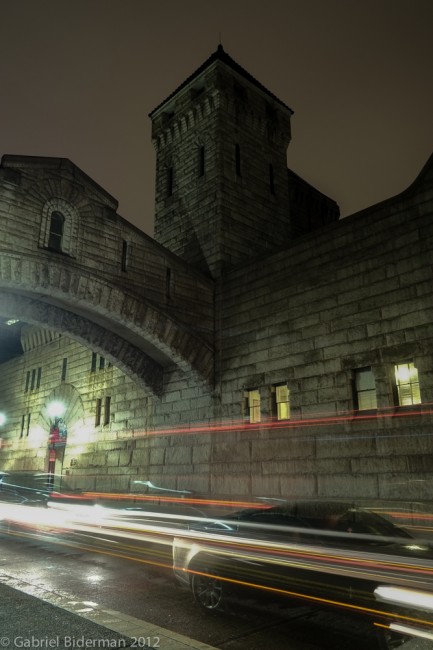
Allegheny Old Jail v3 ~ Fujifilm XE 1 with 18mm lens ~ 14s at f/8 ~ ISO 200

Winter is upon us and instead of hibernating, take advantage of the official Night Photography season!

I find winter night shoots to be more productive than the summer as I can shoot earlier and longer. There definitely can be challenges to photographing in the winter, especially in those colder locations in the world.  But when it snows there is magic to be made! So bundle up accordingly and I’m going to give you some tips on how to capture those snowglobe winter wonderlands.

Typically, when we photograph at night, we have our camera, tripod, and cable release all good to go.  We open the shutter, possibly light paint, and then close the shutter after the extended exposure.

This first shot of Pittsburgh’s Allegheny County Courthouse and Jail, (1888), demonstrates a typical 12 second exposure.  But the image isn’t showing the snow that is falling on the scene.  That is because the snow is never in the same part of the sky for more than a second.

Look closely – you can see through the car, as it was only there for half of the time.  Once it drove out of the scene the camera kept exposing and revealed what was behind it – the yellow double line, the bricks from the building, etc.  Direct light is the only thing that can pass through a picture and be forever etched into the image. 

Note all the streaks of light – these are the head and rear lights of the cars driving by.  The tallest red lights were from a truck, I always like getting different levels of lights from all the types of vehicles that pass by.   Snow, unlike rain, is white and reflective.  So by using a flash, not a flashlight, we can freeze snow forever in the photograph. 


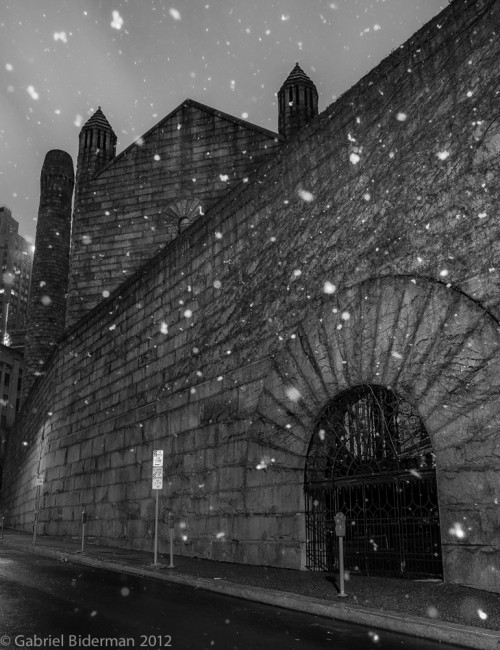
In the second image, I used a Nikon SB910 at 1/8 power off camera.  I stood at a 90 degree angle to the right of the camera and manually popped the flash to shoot across the scene.  This was important because I didn’t want any extraneous light from the flash to be lighting up the building and background. 

I fired the flash 3 times so it could “light up” more snow. My only issue with this image is that the snow is blue.  I had set my white balance in camera to 3200 kelvin to cool down the orange light coming from the sodium vapor street lamps.  But a flash’s color temperature is set to daylight or 5500 kelvin, which when mixed with the cooler white balance of the camera creates blue snow. I could set my in camera WB to 5500 to match the flash but that would be a 2000+ kelvin change in how I wanted the scene to look.  The snow would be white but the rest of the image would be under an ugly orange cast.  Even if I cooled it down post, the snow would have changed to blue again because we are globally turning the whole scene cooler.

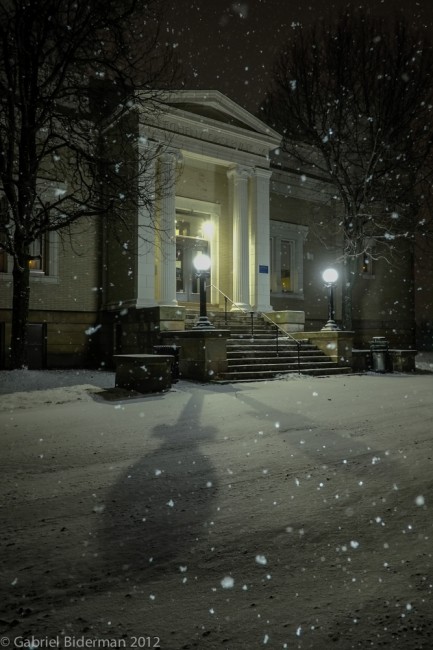
An easy fix is to convert the image to Black and White like I did in the third photograph.  This scene actually looks better stripped of color.  The formidable fort of a jail appears even more ominous and the snow is of course white.  However black and white isn’t the solution for all photographs. The best way to capture white snow with the cooler night color temperatures is to use a CTO, Color Temperature Orange, filter over your flash. 

The CTO filter can convert the 5500K of the flash to match the cooler white balance that you have chosen in camera. CTO gels come in a variety of “cuts” – here is a breakdown of the different gels and what they convert to: Full CTO converts 5500K – 2900K 3/4 CTO converts 5500K – 3200K 1/2 CTO converts 5500K – 3800K 1/4 CTO converts 5500K – 4500K 1/8 CTO converts 5500K – 4900K   You can purchase a sheet of these gels inexpensively and use them over a variety of flashlights or flashes They are also available in convenient kits by Honl, Rogue, and Rosco.   The first step in figuring out what gel to “match” the scene is to take a test shot to figure out your ambient light and what in-camera WB setting will look best.  I typically shoot somewhere between 3800k-2900k depending up on the light source in the night scene.  Knowing that, I always bring these three CTO gels – 1/2, 3/4, and full cut.  


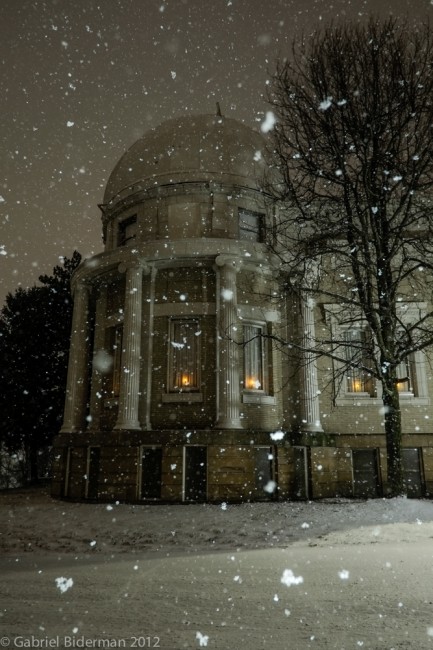
In last two shots of the Allegheny Observatory my camera’s WB was set to 2900 and I used a full CTO gel over the flash. 

This time I angled the flash under but about a foot in front of the flash and fired up.  That angle was lighting up the snow better and the closer snow made it look bigger.  You have to make sure you are not firing into the lens, having a shade not only helps prevent flare but also restricts the amount of snow from landing directly on the lens.

  I used 1/8 power and fired 3 times – freezing the snow falling directly in front of the lens. Be conscientious of how many times you pop the flash.  Three times seemed to be the perfect amount for how the snow was falling this night. 

The last shot shows when I fired the flash 5 times and lit up too much snow and I feel it takes away from the rest of the picture. The snow was also a cold dry snow that wasn’t getting my camera that wet.  Typically I would bring an Kata Elements cover to protect the camera from getting wet.   So when the weather outside seems frightful, forget that fire so delightful, grab  your flash and CTO gels and Let it Snow, Let it Snow, Let it Snow!
Postphobia

Posted on 9 Comments

Post-pho-bi-a [post-foh-bee-uh]
noun
A persistent, irrational fear of blogging that leads to a compelling desire to avoid it. This typically happens when there has been a long interval between blogs and when work, life, and FB interfere with the amount of free time the blogger thinks he/she has.
See www.ruinism.com

There, it’s out of the way. I think it all started this spring when my Nikon D700 and newly acquired 35 1.4 lens was stolen while I was traveling in Milan. Thankfully I wasn’t physically hurt but it certainly depressed the hell out of me and sent me on a bit of a photo funk.
Now most of you know that I work for a small camera shop called B&H and have access to loads of camera gear. So instead of dropping another $2500 on a camera, I figured, now was a good time to really give some new and different cameras a workout. However what I failed to realize is that I had grown to love my D700. It, combined with either a Lensbaby or the Zeiss 21 2.8 lens had truly become an extension of myself.
So however many cameras I tried, I never felt “it” until my good friend at Fuji let me borrow the hard-to-get Fuji x100 for a month. Was it a perfect camera? No, but I also believe there is no perfect camera; we just try to find what best matches our needs. On a whim I brought the camera out to our last Bannerman Night Workshop of 2012. And that’s when I fell in love again. Yes, I was a sucker for the retro rangefinder design and the image quality was very impressive. But at night, during long exposures, it rocked!
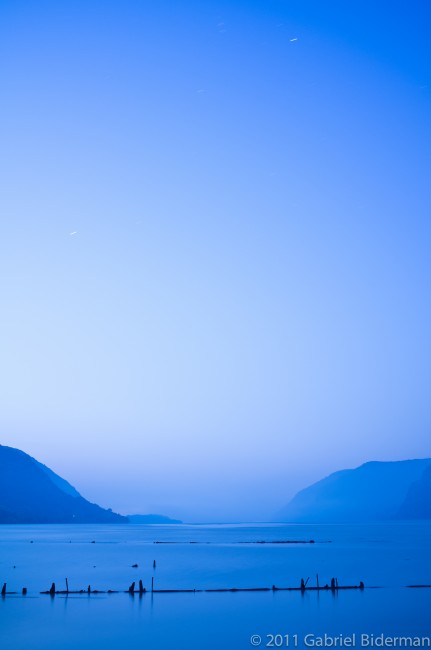
The image above is called the Blue Hour. It was taken during the early morning as the night gave way to the day. You can see the small star trails at the top resisting the mists of the morning. It was a magical moment to capture but also to just sit back and enjoy.

However, soon after this shot, I had to return the camera to Fuji and it was again a long waiting list, even for a guy like me. But I’m a lucky fella, who married the right girl. Nancy had noticed how much I enjoyed “seeing” with this camera and surprised me by getting it for me for our 5th year anniversary.
So I’m back – inspired to shoot and back to blogging!

Upcoming Events

Posted on 1 Comment

2009 is turning out to be a creatively successful year so far and March is packed with some great group shows as well as my first solo exhibit in NYC!

First up, the 11 th Annual International Krappy Kamera Show, which features one of my previously unseen images, opens on Tuesday March 3rd at the Soho Gallery.  This is always a fun exhibit featuring images made from creative artists and their toy cameras.  The Opening is from 6-8pm, with voting on the People’s Choice Award ending at 7:30pm, so get their early, drink some wine, enjoy the images, and vote!

Jill Waterman and Daryl-Ann Saunders curated and brought together some of the best modern nocturnal photographers for two exhibits featuring the fine art of Night Photography that will open on Thursday March 5th at the Farmani and Safe-T-Gallery.  These Galleries are right across from each other in DUMBO Brooklyn, and the opening will be from 6-8pm.  Several of these photographers will also be speaking at B&H’s Event Space on Monday March 9th.

On Friday March 6th a couple more openings:

First, my dear friend and fellow blogger and photoartist, Angelia Lane, will have several of her paintings featured at ArtSlant’s Group Show, World of Imagination.  The opening is from 6-8pm and will run to the end of the month at the APW Gallery’s new location at 48-18 Van Dam Street, Long Island City, NYC.

If you are heading upstate that week, one of my photos will be in a Group show titled Festival of the Visual Arts, at the Morton Library in Rhinecliff.   The Amtrak train drops you off within 3 blocks of the Library and the show is curated by the newly engaged Sandy Bartlett.

Now mark your calendars and plan your trip to NYC accordingly; I’ll be having my first solo show titled “The New York Years” at John Allan’s in Tribeca on Friday March 20th from 8:30-10:30pm!  This exhibit will be touring the four NYC John Allan’s locations throughout the year but you’ll definitely want to come celebrate with me on March 20th!

And finally, on the last day of the month come and test drive the newest Lensbabies at B&H’s Event SpaceDavid Brommer, Jennifer Diamond, and I will be giving a slideshow presentation on how to get the most out of these creative lenses and then take you on a photo safari as we Lensbabify Times Square!

So shake the winter blahs off and I hope to see you out there this March!

The f295 21st Century Opening Weekend!

Posted on 3 Comments

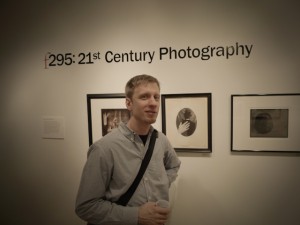
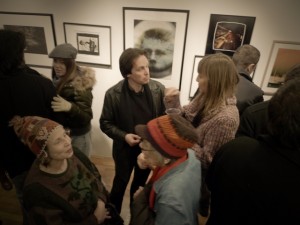
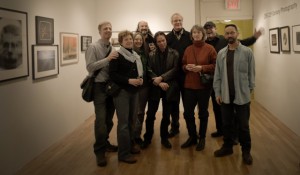
The f295 kickoff last weekend was a huge success!  Thanks to the over 150 people who came out to Saturday night’s 21st Century Photography opening!  The work and vibe must have been reminiscent of Stieglitz‘s old Camera Club openings!  Thanks  also to all that helped put the show together:  the artists who shared their work, The Camera Club of NY who gave their 500 square feet, David, Jennifer, and Amy on the B&H organizational end ~ as well as serving up a record amount of kosher wine!  And finally, Tom Persinger, who brought us all together and had one heck of a time trying to make letters stick on walls.

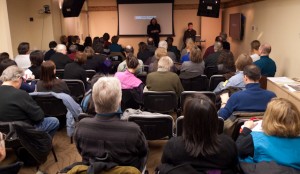
Wondering what camera to document the gallery opening with, I finally settled on using my trusty Panasonic LX-3, which is an advanced digital point and shoot.  The pioneering Panasonic has a little throwback feature, it has a pinhole scene mode!  See, I told you that pinholes were enjoying a renaissance!  For some reason the pinhole mode is limited to 3MP images while applying a vignette and desaturating the image.   I know it would have been better if the lens could have come off to reveal a real pinhole over the digital sensor but hey, I wasn’t going to get everyone to stand still for 5 hours for the group shot! All the images on the left were taken in this “pinhole mode” while the right hand side shows the packed house for Sunday’s presentation at the B&H Event Space.  For the second straight year over 80 people showed up to listen and learn about new ways to use older technology.

We all struggle with keeping our art and life fresh and new.  For photographers the terms wedding, portrait, landscape, pinhole, or even alt process can all pigeonhole and limit our vision.  Tom Persinger asks us to look beyond these stereotypes and empower the 21st Century Photography:

The 21st Century Photographer remains open to the exploration and use of a variety of processes, techniques, and technologies so long as the chosen method(s) most concisely articulate their creative vision. A net result of this paradigm shift is not only complete artistic freedom but also a palpable sense of empowerment. Historically photography has marched down the long path of process obsolescence – one in which new techniques replace old in a continual cycle of progress. In a 21st Century approach, however, control is wrestled from profit driven agencies -corporations, advertisers, and the marketplace all promoting a consumptive photographic model- and given to the artist/photographer. By virtue of taking the responsibility of control, photographers allow themselves to use a pastiche of tools and materials to make pictures. It is this freedom -which is new for many- that empowers and fuels the 21st Century Photographer.

Photography is a toolbox with many means to express your vision.  Some people choose one, others need multiple instruments to complete the vision.  This weekend I saw art that was in jars, painted on, waxed, dyed, and printed on anything from the latest digital technology to handmade emulsions on a variety of surfaces from tin, glass, and paper.  The photograph that I submitted in the show was originally a 6×9 slide.  I was deciding between two basic ways to present my print:
1.  Drop it off at a lab and have them make a negative copy of my positive slide and then a C-print
2.   Scan the slide and print at home on inkjet.
Now, my good friend and constant conscience, David Brommer, stood aghast when I told him that I  I was leaning towards the lab option;  mainly for convenience as I am still not 100% confident in my inkjet printing.  I’m still most at home in the B&W darkroom.  But he reminded me that I had to control the final outcome of my image.

And really, it is all about the process ~ from start to finish.

Now did I enjoy spending close to an hour digitally removing dust from my image?
No.
Is the excitement the same as flipping over the black and white image in the developer under the red light?
Nope.
But, seeing a project from start to finish is still pretty damn fulfilling.

Lensbaby Composer ~ Double Glass times

Posted on 4 Comments
Composer_DGlass_LIT2.jpg

The Lensbaby Composer lens has a unique optical swap system in which you can own one lens yet have 5 different capture methods.  Think of the ball and socket Composer as a chassis to hold multiple visions.  In my last two posts I have shown you images taken with the Zoneplate/Pinhole optic as well as the Plastic uncoated optic.  Both are fun and unusual ways of seeing the world in a whole new way.  Each one of the optics is a bargain for $35 each or I recommend purchasing the whole set for $95.  The set includes the Plastic, Pinhole/Zone plate, and the Single Glass optics.  All the optics are the equivalent to a 50mm lens, or what we would call normal vision.   The Composer and Control Freak lenses come with the Double Glass optic.  Because the double glass optic has multiple coatings it makes it the sharpest lens in Lensbaby Family.  If you want to buy The Muse Lensbaby you have the option of Plastic or Double Glass optic.
I’ve really enjoyed using the plastic and zone/pin optics but last week I made it a point to only shoot with the Double Glass lens and see how sharp it really was.  Let me preface this by saying that all the images I’ve taken in the last 2+ months have been with an APS-C sized digital camera sensor and are usually shot at f/4 or f/2.  If you shoot much beyond f/5.6 you start to lose the vignetting affect.  Also, if I were to shoot with a full frame digital or film camera the vignetting or out of focus area would be even greater.
I arrived Friday, in San Francisco on a night of the full moon.  My resolution this year was to do a night shoot each month during the full moon, so without wasting any time, I set up my camera and tripod on my brother’s second story deck in Glen Park.  I’ve wanted to do a Lensbaby night shoot and the rolling hills of SF lit up by the moon, the rare starry sky and the millions of twinkling lights were just taunting me.
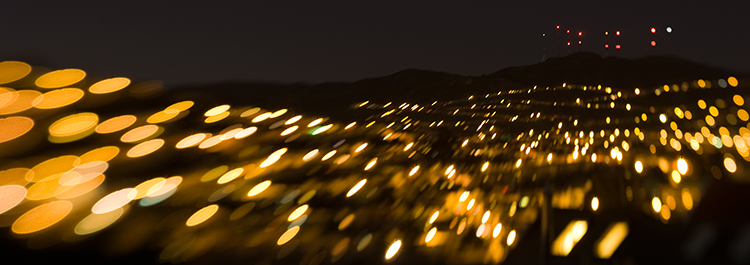
The top image was taken facing the San Bruno Mountains and with a slight bend of the Composer, I focused on the distant radio towers and defocused the house-lit hills.  With the second image, I screwed on the wide-angle adapter to provide a more expansive point of view.  You can click on them to view them larger – which one do you like better?
A lot of people ask me, “Why do I want to use a Lensbaby?  I can do that effect in Photoshop.”  I always tell them that it is way more fun to control the effect while shooting and really interact with your subject in a brand new way; plus the pebbles of light that nightlights turn into is truly UnPhotoshopable!

Our last evening in Brooklyn, before we left for SF, we saw a great concert at a fantastical new venue, Galapagos.  The Galapagos Art Space in Williamsburg recently located to DUMBO.  I feel this new space is more successful visually and spatially. Each banquette is it’s own island amidst a body of welcoming water.  The orchestra level also provides more pleasurable viewing (and photo) opportunities.  Performing that night were two bands from North Carolina and our hometown favorite Balthrop, AlabamaThe Never kicked things off with a pop/blues grass vibe.  I was really impressed with the 11 piece folk orchestra tunes of Lost in the Trees.  In fact, I was so impressed with them that we bought their album – Yes Vinyl!  The three concert shots to the left showcase the creative inspiration that a Lensbaby can add to musical venues.  I was bending the composer pretty extremely to limit the area of focus and add movement to the vibe of the photo.

Back to San Francisco, the main reason for my visit was to see my family.  My nephew Oliver, who has had his Lensbaby portrait taken on this blog previously, was of course the subject to probably 250 of the 300 shots that were taken on this trip.  Lensbaby babies and portraits are just guaranteed fun!  Imagine a world in which the person doesn’t know and is fascinated with this camera-tool that you are using.  I don’t know if that world exists, however with a Lensbaby mounted on your camera the 4th wall is broken and new eyes wait to be captured.  What is that bendable almost posable funky lens doing?  It even makes your camera quite retro!  9 times out of 10 it also makes you shoot in manual mode so it makes you think about your image-capturing even more.  Shooting Oliver on the swing took some practice and there was more misses then hits but when I got it, it was certainly a home run!

California has been a destination for many a lost soul looking for meaning.  And one of the most wonderful things you can do in your life, whether your soul is lost or found, is to witness a sunset along the California coast.   The unusually warm day brought a stellar sunset to the many people who had ventured out to Ocean Beach.  And there we stood, at the end of the world, watching the colors slowly fade to night.
Click.