The Big M in the sky

Posted on 1 Comment

How many times do we say we are going to do something and it falls by the wayside?

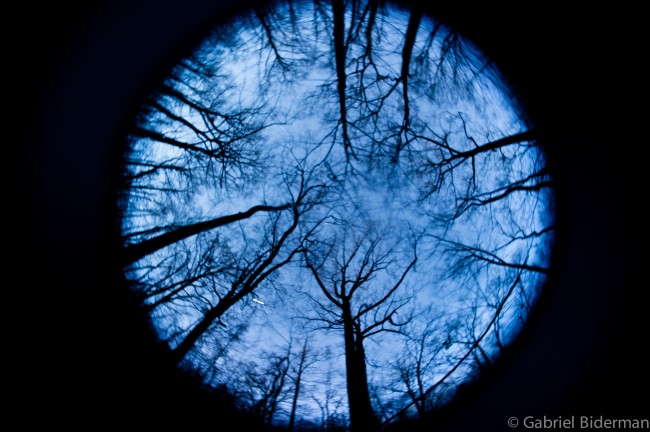
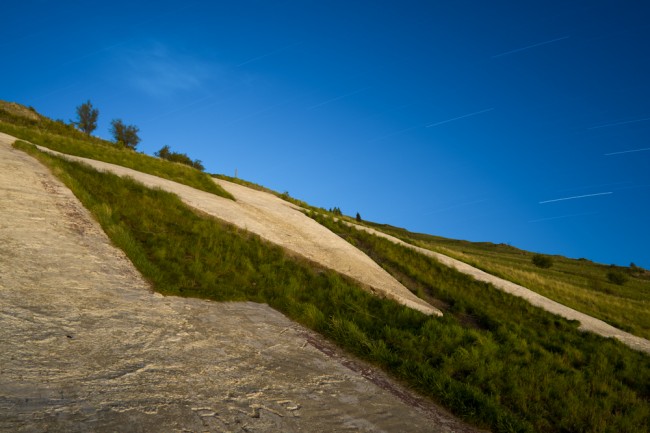
I’ve wanted to shoot the Big M in the sky since the first time I saw it over 5 years ago. It first beckoned me as my flight started it’s descent into Missoula Montana on a visit to the Rocky Mountain School of Photography.  The 125′ x 100′ Giant M rests on the east side of Mt Sentinel and represents the University of Montana but has come to symbolize the spirit of the city as it has loomed over Missoula in one form or another since 1908.

It is accessible via the Big M trailhead that is only 3/4 of a mile hike but quickly ascends 620 feet via 13 switchbacks.

Let’s just say it was a good workout for me – especially after a visit to the Big Dipper!

No moon was up but the path was easily lit by the city lights.  I passed by a man walking his dog, several students, and a few lovers.

The M calls to us all.

When I finally arrived, I was slightly disappointed to realize my 28mm lens wasn’t wide enough to capture the vision I had of the M in the sky.

So I hiked above and around to find a better vantage point but to no avail.  The best angle was below the M or probably back down on campus looking up the mountain.

I wasn’t going to let the mountain get the better of me so I returned to the bottom of the M and resolved to take the best picture I could.

I worked the composition with my Fuji X Pro 1 and 28mm equivalent lens and let it cook for a 30 minute exposure pointing south for the longer/straighter star trails.


In the end I was happy with the image.  Was it what I imagined?  No, but I’ll be back and hike up that mountain with a 14mm lens and get more of that M in the sky.


With that being said, I’d like to share A Week of Art project that I conceived with my good friend and fellow artist Matt Hill.  I’ve been frustrated with too much ingesting and not enough outputting.  It’s been a weird sort of slump as I feel I’m creating lots of good images but can’t seem to get motivated to blog or print.  And sometimes you just need a friend or a loved one to help motivate you to take the next step.  So Matt put together A Week of Art blog for us to share our creations of the week.  It has definitely refocused me and several of our friends.  My submission this week was a totally different interpretation of my hike up Mt Sentinel.


As exciting as it is to compile those notes of all the of places you want to go, things to do, or blogs to write –  remember that life is a great balancing act and it is the “doing” that makes us feel the most alive.


Feel like you need a kickstart as well?  It is an open group dedicated to creating one tangible piece of art a week – Join and Inspire!
Twilight Stop ~ Photo of the Week

Posted on 4 Comments

When I was first getting into photography I was told that the easiest way to improve your images was to shoot during the magic hours, usually one hour before sunrise and one hour after sunset. For some crazy reason I chose the early morning hours to shoot. I was immediately impressed by the soft quality of light in which to work with but early mornings are really not my forte. I’m more of a late night guy and soon afterward a body of work began to emerge from this nocturnal shooting.
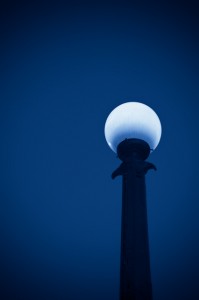
The magic hour of civil twilight, or the blue hour, has neither full daylight or complete darkness. It is one of my favorite times, whether I have a camera or not. The quality of light is amazing as the cobalt blue sky can quickly change to deeper shades of blue until complete darkeness.
How long this civil twilight lasts all depends on your longitude and what time of year it is. Twilight can last 15-20 minutes near the equator or several hours when you get closer to the poles. When I was in Alaska in the summertime, I remember twilight lasting until 2am.

In Brooklyn the civil twilight has been about 45 minutes lately. Luckily the other day I exited the subway just in time for a true magic hour moment.
The top image reminds me of something Brassai might have shot during his nocturnal adventures in Paris during the 1930s.
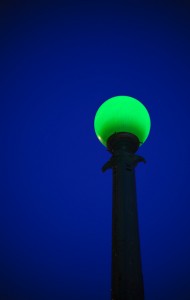
When I imported the images into Lightroom, my preferred program to process digital files, I converted the above image to black and white to create more of a dramatic look.  However I missed the twilight blue sky, so I started toning selenium and mixing the blues back.
I really like the end result. I’ve included another version of “Twilight Stop” that was not converted to black and white.
Which do you prefer?

For more info on the making the most of the magic hour check out Tim Cooper’s new DVD Magic Light – The Landscaper Photographer’s Guide.

At the Drive-In… Ode to Sugimoto

Posted on 3 Comments

Galleries and Museums are an invaluable source of inspiration. It was on one of my first visits to the Fraenkel Gallery in San Francisco that I was introduced to Hiroshi Sugimoto’s work. I was awestruck when I saw the small 8×10 image of the old movie theater at Radio City Music Hall hanging on their wall in their back room. The movie screen was burning bright white and subtly lit up the entire theater. As I studied it more I saw ghosts of a few people sitting in seats. I was enthralled.

Sugimoto explains: “I’m a habitual self-interlocutor. Around the time I started photographing at the Natural History Museum, one evening I had a near-hallucinatory vision. The question-and-answer session that led up to this vision went something like this: Suppose you shoot a
whole movie in a single frame? And the answer: You get a shining screen. Immediately I sprang into action, experimenting toward realizing this vision. Dressed up as a tourist, I walked into a cheap cinema in the East Village with a large-format camera. As soon as the movie started, I fixed the shutter at a wide-open aperture, and two hours later when the movie finished, I clicked the shutter closed. That evening, I developed the film, and the vision exploded behind my eyes.”

At the time Radio City Music Hall was the only image of his hanging at the Fraenkel. But his series on Theaters lasted from 1975-2001 and took a nice turn when he incorporated Drive-Ins.

Let’s just step back and think about this for a moment. Large format camera, probably an 8×10, that he exposes for the entirety of the movie; capturing all the millions of film images on his single frame. The essence of the movie is white light which is time itself exposed.

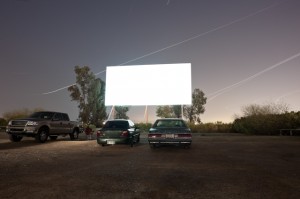
With Drive-Ins and classic movie houses all but extinct in America, these images truly capture the spirit of a fading era. It is as if the white screen is revealing all the movies and memories the theater has experienced. The Drive-In shots added extra depth to time-exposed as airplanes and star trails would permanently incorporate themselves to the image.

When I found myself in Scottsdale, Arizona with a free night, I remembered the last time I was here I went to the Drive-In. A quick check on the web revealed the Scottsdale 6 was still in existence! It featured not one, but 6 different screens to choose from and is open year round. I packed two tripods and cameras, one film and one digital, to see what I could capture. It was jam packed at the Scottsdale 6 on a Saturday night, at least 50 cars at each screen. We eased our way to the middle of the Shutter Island screen, second row. I set up both tripods low and directly in front of the car so as not to interfere with anyone else’s vision. A truck load of teenagers next to us must have thought I was recording a boot leg version! I set up my Mamiya 7 to expose for the entirety of the film but came to the conclusion that digital capture would really max out with a 30 minute exposure. Add 30 minutes of in-camera noise reduction which gave me two shots to make some magic happen.

You can see the airplanes come and go, or circle around on the right; star trails shoot straight up on the left. Why is there one person, yet three cars? Cars were turning on and off to recharge their batteries throughout the film and their headlights briefly lit up the foreground giving more depth to the image.

It was very exciting to capture this amount of time in one exposure. Often with long exposures and night photography, the camera will reveal much more than our eyes can see.
It is this unexpected certainty of knowing some of what will happen during the exposure- but how much of it can we control?

Let go, and let the visions explode behind your eyes.

Valley of Fire

Posted on 4 Comments

If you are in Las Vegas and want a landscape that is far more impressive then the manscape called Las Vegas Boulevard, I highly recommend a trip out to the Valley of Fire.

Less then an hour northeast of Vegas, past the quickly depleting Lake Meade, you’ll find Nevada’s oldest state park.  “Valley of Fire derives its name from red sandstone formations, formed from great shifting sand dunes during the age of dinosaurs, 150 million years ago.” Not only have the dinosaurs lived here but the Basket Maker people and the Anasazi Pueblo farmers have also passed through leaving their mark on Atlatl Rock.
The dramatic red rock surrealistscape makes you feel like you are landing on Mars.  No wonder it has been a popular location to shoot many movies, including Total Recall’s Mars.  So with an extra night in Vegas I loaded up the minivan with a group of friends and photographers and we headed out for a sunset/nightshoot.
The plan was to meet dear friend and wedding/fine art photographer David Ziser and his wife Ladawn somewhere in the park.  I’ve toured and worked with the Zisers for several years, but was really looking forward to actually shooting with them!  David just released his first book, Captured by the Light:   The Essential Guide to Creating Extraordinary Wedding Photography, which is quickly climbing the charts of Amazon’s top selling Photo books!
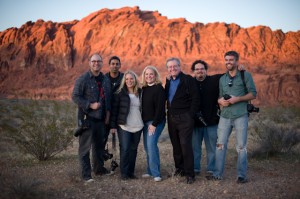
Well, 15 miles before we reached the park we quickly learnt that there is no cell phone reception in Mars.  Luckily the park if fairly small with the main Valley of Fire road connecting the East and West entrances of the park.  And surprisingly within 20 minutes we ran into each other chasing after the last licks of magic hour light.  Click on the wonderful group shot taken by Matt Hill to see who all the players are.
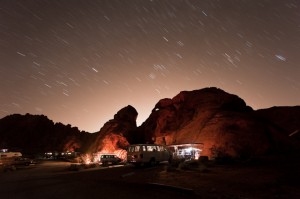
In order to photograph in the Valley of Fire at night you need to have a camp site.  So with the twilight hour now behind us, we headed out to the Arch Rock Campground that we had scouted earlier.  Zoobroker got right to work seasoning up the meat and firing up the grill.  Matt, Sylvester, and I set up our tripods and started popping red gel’d flashes as we went from chasing the light to chasing the stars.
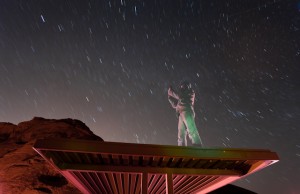
Sebastian in the sky was a 6 minute exposure and then I pulled back to get more of a feeling of the whole campsite.  It was packed, we were lucky enough to get one of the last spots that was right in the front of the entrance.
We definitely felt that we were in the Valley of the Gods.
Thanks to Zoo that was the best camp meal I’ve ever had, pork loin and home-made cheese stakes!
Sorry, no pictures, it was quickly devoured by all of us in record time!
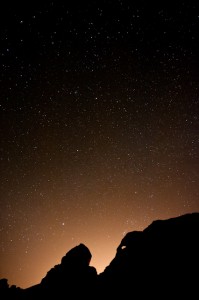
Most of the images you see here were shot at a lower ISO, but the “Elephant Eye” photo at the bottom was shot at 6400 ISO to capture what the night sky actually looked like.  Obviously we were far away from any city lights and the sliver of a moon had not risen yet which meant plenty of stars in the sky.  By keeping your exposures under 30 seconds you’ll get more of the celestial feel of the night which can be just as beautiful as those long star trails.
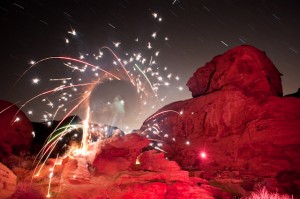
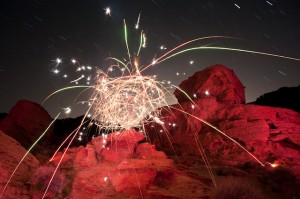
Sylvester, who I quickly learnt is prone to dancing with fire, was the next subject of our shoot.  The difference between the two photographs is what happens when you twirl light in a continuous pattern as opposed to a chaotic pattern.
Which one do you like more?
Remember any light that is in the frame of your photograph, whether coming from a flash, flashlight, or flame will be permanently exposed in your image.  Sylvester spun the light for approximately 30 seconds and then I popped a red gel’d SB900 on the rocks about 5-8 times at full power to enhance the red rock.  I needed to walk into the image during the exposure in order to get close enough for the flash to “read red” on the rock.
Why is it that you don’t see me in the image?  I was blocking the light, not getting hit by it directly, and I was never in the same place for more than a few seconds during these 8 minute exposures.
I did slip up once in the image Inside the Beehive #2, but luckily it perfectly matches up with some of Sylvester’s sparks.
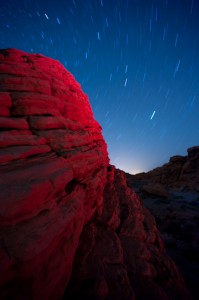
In the last shot of the night I wanted to go long and get a more atmospheric shot of the Beehive.  I set up for a 15 minute exposure and popped the red gel’d flash at 1/2 power 4 times about 8 feet away and at an angle to add depth to the rock.  This ended up being my favorite shot of the night, though I really liked all the ones you see selected here.
Matt Hill also got some killer shots that you can see in his 3-part blog titled Valley of Fire.

Next up…Night exposures at the Drive-In Theater